![]()
Introduction
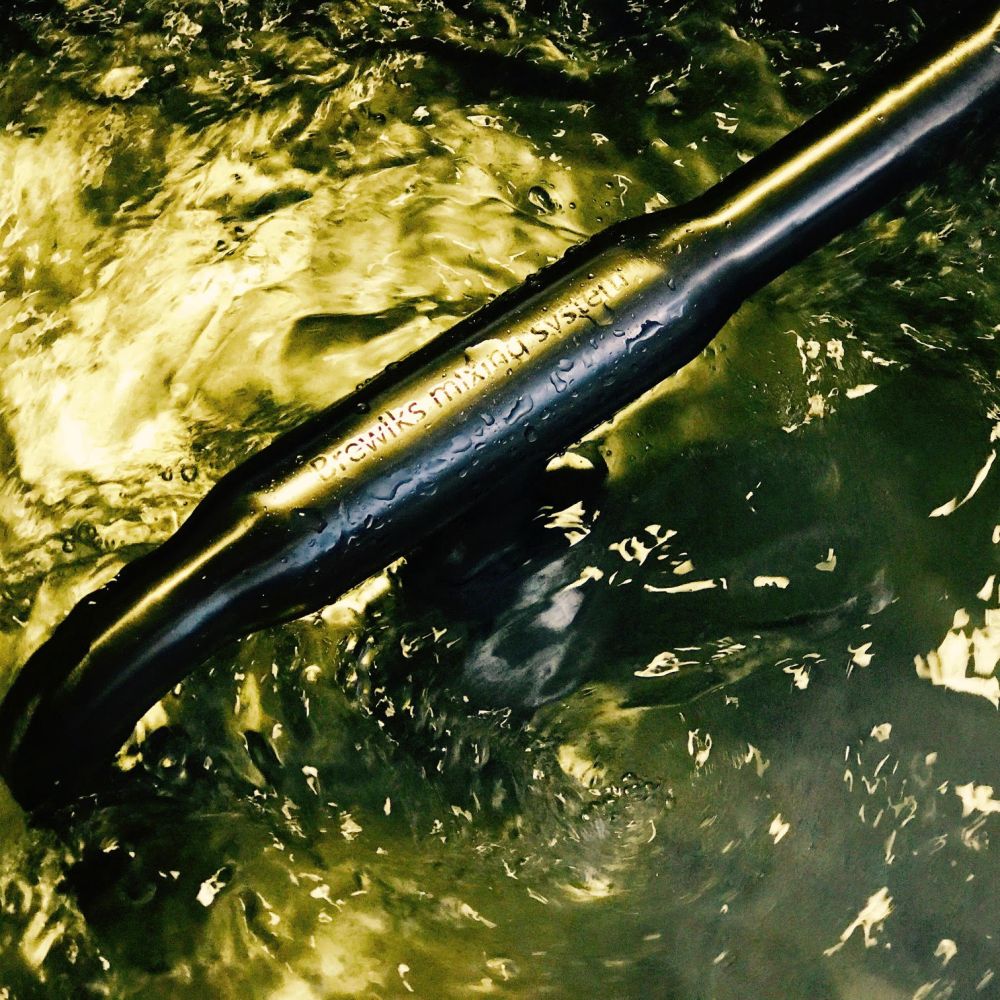
So, after having a couple of months’ worth of fun on this amazing system, designed and manufactured in Slovenia (EU), by a family owned company Mithraeum. It was the skillsets of two brothers and their families, in two separate family businesses, namely Vizir breweries and Mithraeum, one brother a talented craft brewer and the other an engineering genius. Together they started the Brewiks revolution with this wonderful piece of human ingenuity. I’ve decided to review it so that the questions that are asked would be available to everyone!
I’ll start by telling you that I have truly put this brew system through its paces – I have used it for operations even the creators didn’t know it could do. Things like cereal mashing, decoctions, double batches (grain overloading), raw vegetables, turbid mashing, etc – and I have been both pleased and amazed at the results this brewhouse delivers. It doesn’t matter how much punishment I dish out on Brewiks in pursuit of the perfect pint, the machine takes it in its stride. To put it another way – if Brewiks was a human, he’d be a 7 foot tall, bull-necked, tattoo covered behemoth, sporting a full beard, smoking a bullcap pipe with a mischievous glint in his eye! Every time in the past when I did something in a recipe where I thought “this is definitely going to break something”, I can almost hear the machine reply in a deep, heavily-accented Slovenian voice: “Iz not mattor, ve vill do zis…” – and he does so swimmingly! But mostly though, my efficiency on this system is mind-blowing! Try 92 – 97% mash efficiency and at least 85% or higher brewhouse efficiency without fail – this makes me a very happy camper indeed.
Features
-
On wheels
Let’s start with the fact that it’s on wheels – if you’re short of space or you would like to use the space for something else while not brewing (maybe kegging or bottling…or even a dance floor if you own a pub!). The system comes on wheels, so when you’re not using it, it doesn’t have to take up valuable space. This also means – which you will start to understand once I’ve explained all the features – that it literally means that you wheel the system out of the shipping container, add a hosepipe and a power point, and you’re brewing straight away. No installation required. Truly a plug & brew system.

-
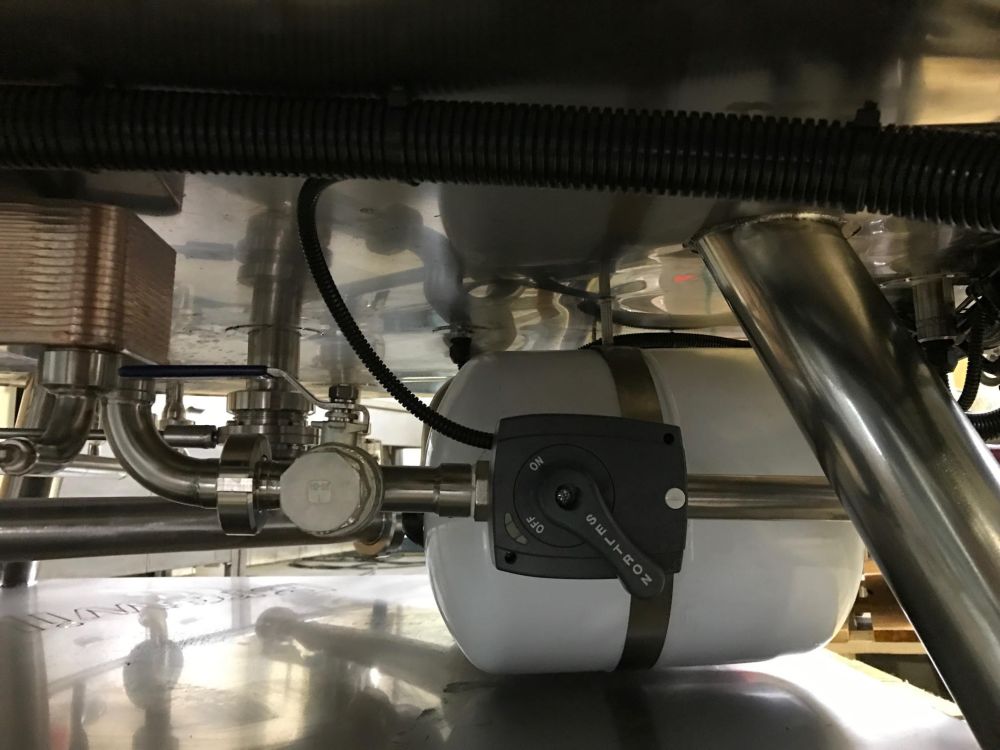
No moving parts
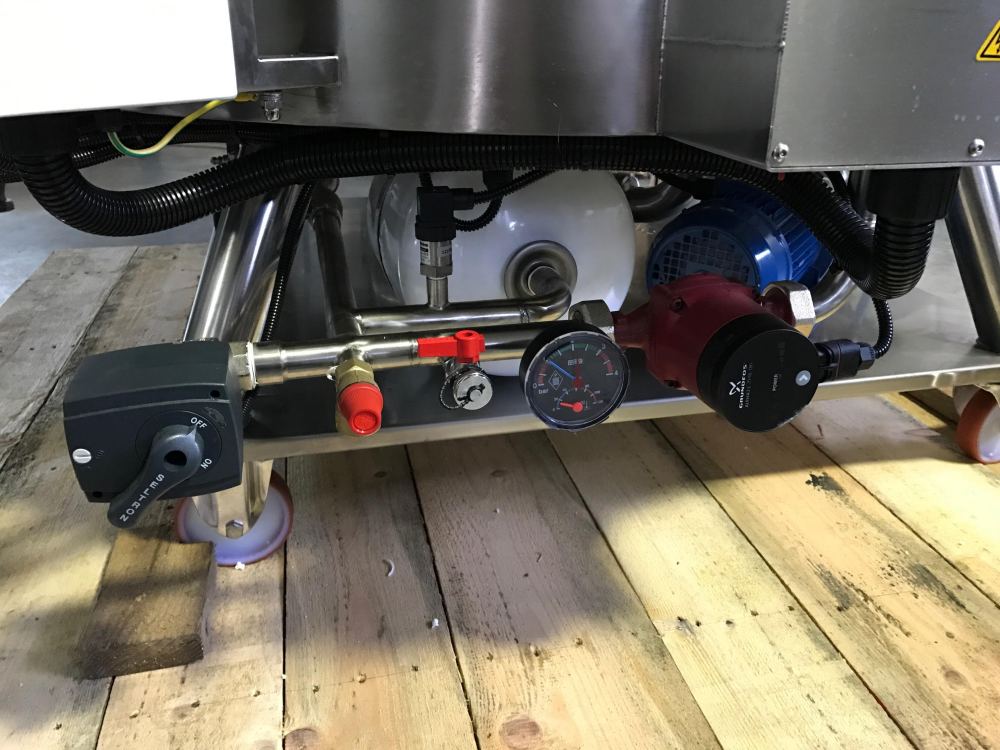
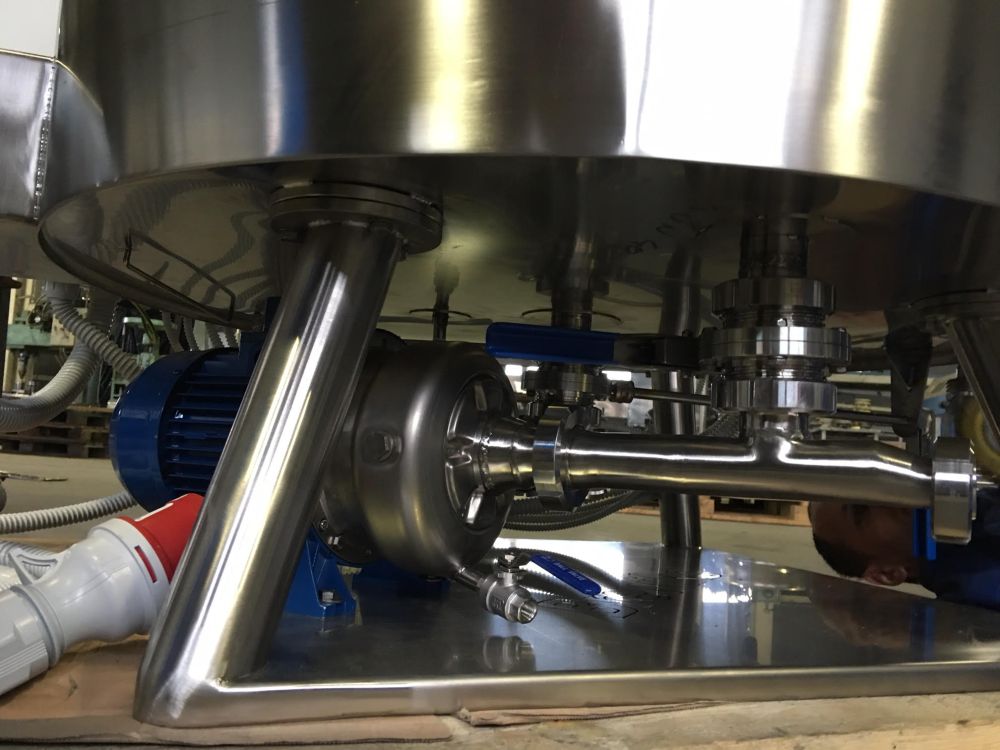
The only moving part on the entire system is a single pump. The manifold that fits on the pump is special, but it’s compatible with any centrifugal pump, irrespective of whether you’re in a 1st world country or plumbing the depths of the 3rd world, you’ll never need specialised assistance. If the pump fails (all pumps do at some time or another), you are quite literally 12 bolts and a wire away from fixing the only possible breakage on the entire machine. Compare that to other systems and you’ll quickly see the value in that as I have. As for the manifold, it has been specifically widened and modified so that it simultaneously will not destroy or degrade the husks from the malt, but will also pump just about anything like sticky raw wheat mashes, raw vegetable chunks, etc. If I could find good enough a reason to put a bucket of rusty nails in a mash, I’m very confident the system will patiently circulate that just as well.
-
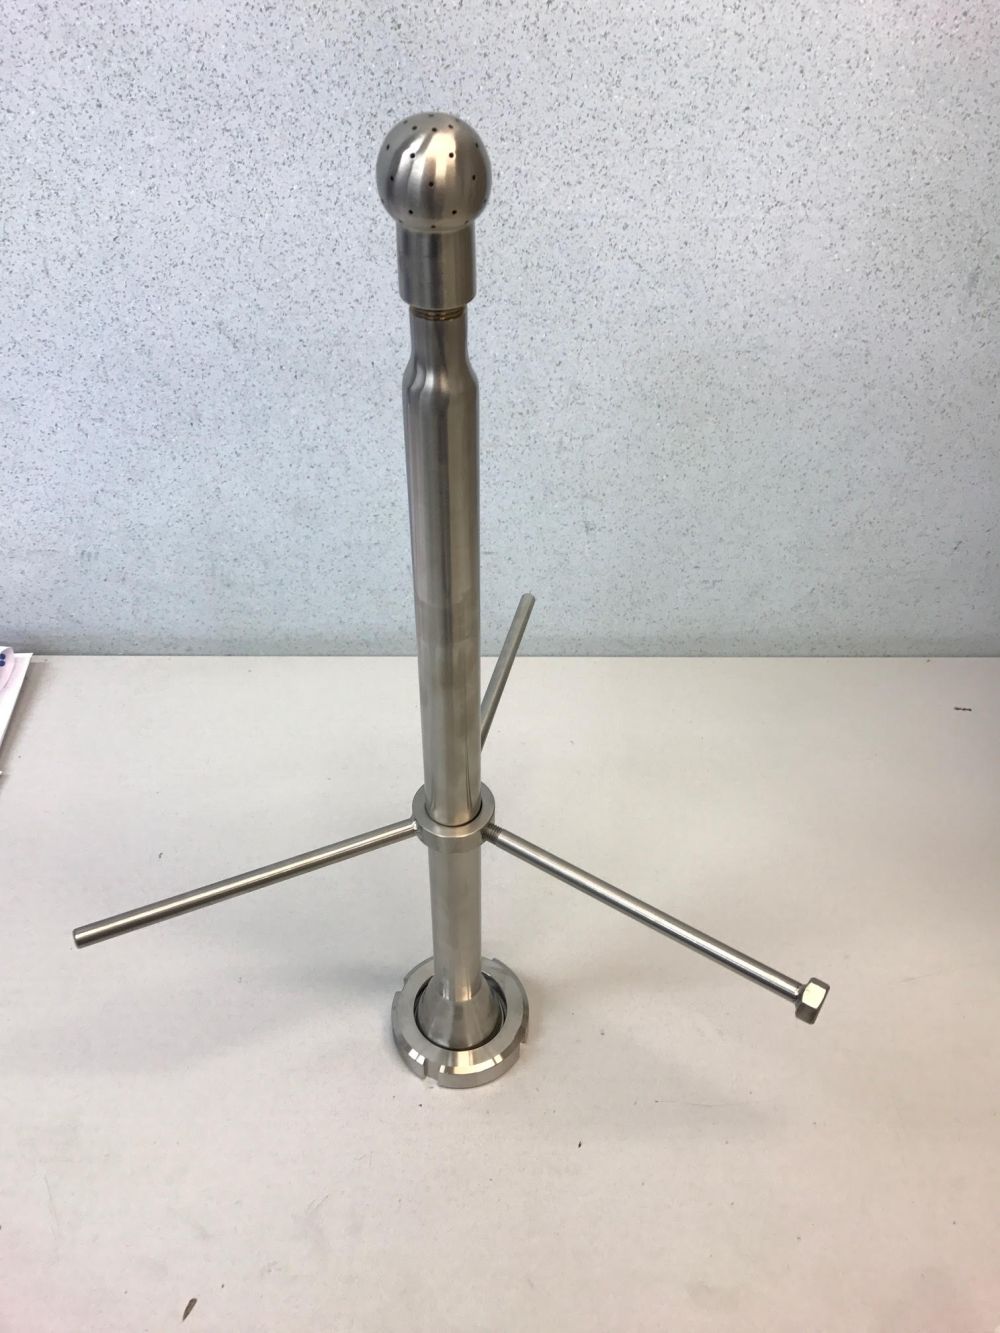
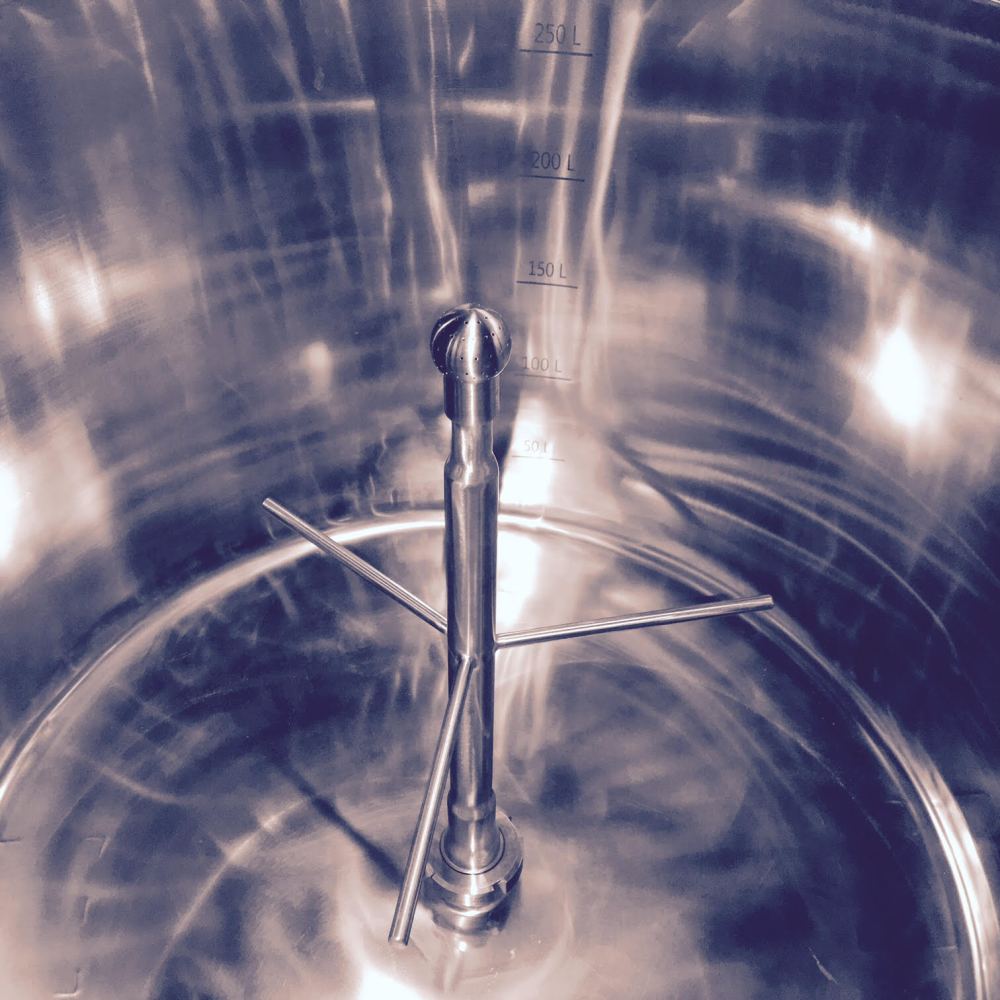
Patented mash mixer & Keg Cleaner
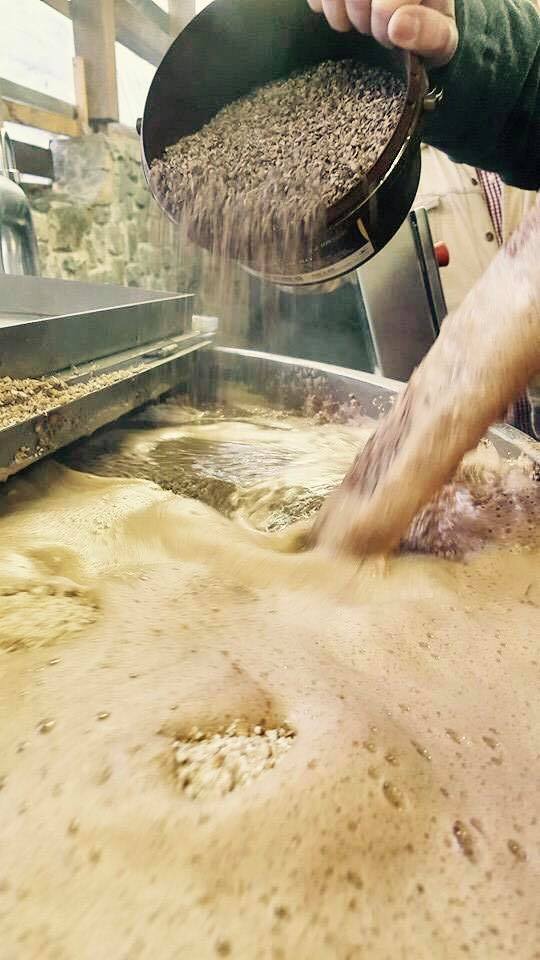
It’s truly fantastic how this system mashes. It has an angled pipe fitting that has been patented, the pump with its specialised manifold, pumps the mash through this fitting and the result is an absolutely equal mixing of the mash – no hot or cold spots. Set the pump down to 60% power and leave the mash to its own devices. If you’re using high quality malt (like everyone should be doing) it almost completely negates the need for the iodine test, as you can be sure with that level of thorough mixing every starch has come into contact with the required enzyme. It also greatly increases the beta-glucan rest efficiency without the need for a thicker mash. As the heading above alludes, simply take out the mash mixing attachment and attach the keg cleaner – voila! Fill the mash tun with a bit of CIP solution and hot water, and upend the keg onto the attachment – you’ve got a clean keg in no time with no extra equipment needed. Clever huh?
-
Heat Exchange / Fog Sparger
Gone are the days where I needed a hot liquor tank! With the Brewiks system, they have created a method where you simply plug your cold water source in to the heat exchange outlet in the back and, through a clever array of different pipes, the water comes out into the sparge nozzles at an agreeable 74°C to 78°C irrespective of whether you have 1 BAR pressure in the pipes or 3 Bar+. It is worth noting though that you may need a cold water tank if you need to acidify your sparge water or process your water in any way. I almost always use reverse osmosis so I only have a tank for that, which I also use for my brewing water. Stepping up to the subject of sparge nozzles, Mithraem have created a system of sparging that keeps your flow rate decently high without disturbing your mash so much as a fraction. This comes through the use of micro-injectors that take the sparge solution and turn it into a kind of “sparge fog” – one of the reasons I assume my mash efficiency is so high.

-
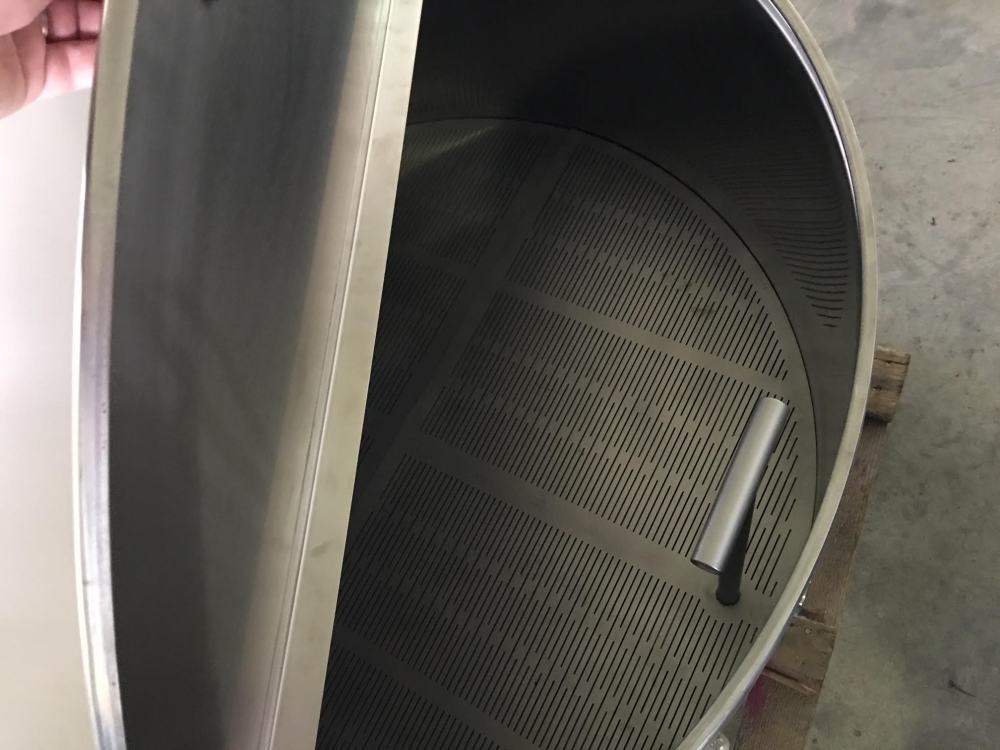
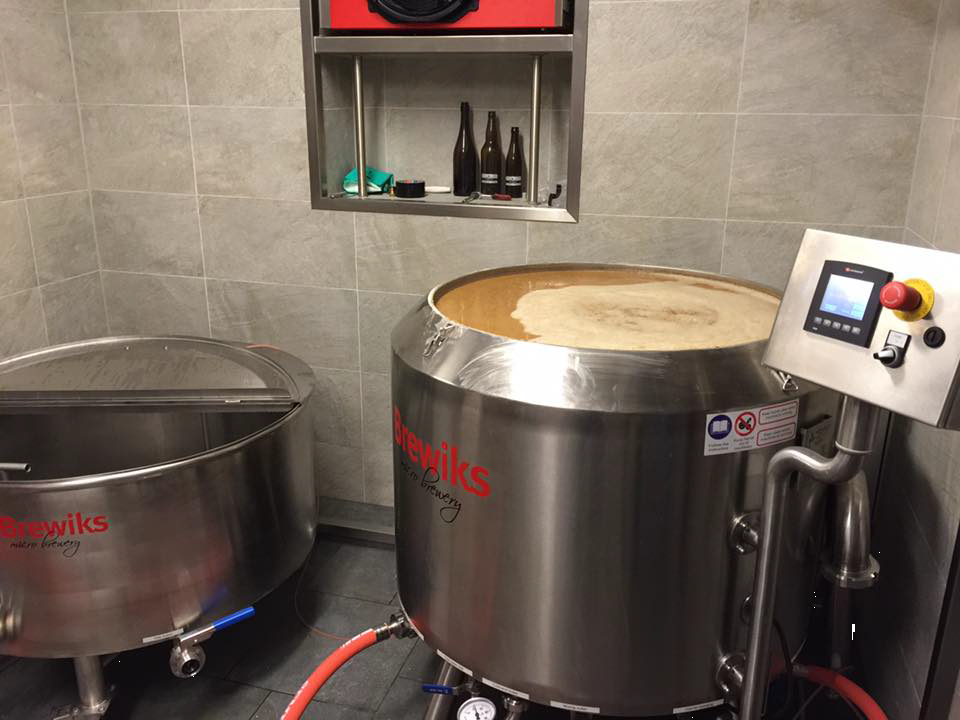
Combination Lauter Tun & Whirlpool
One of the biggest issues I find with standard brewing equipment, is that the grain bed depth is so thick, hence the necessity of allowing gravity to slowly pull the wort through the mash. With the Brewiks system, they have created a combination system of metal inserts: one grill that is used for lautering, and removed it is fantastic for whirlpooling. It is made sufficiently wider for 2 reasons. One for making sure that you grain bed only is about 4 inches thick and your whirlpool makes sure ALL the trub is collected in the center in a nice looking cake, while the clear wort is siphoned off (doesn’t seem to matter if it’s spent hops, hot break or powdered orange peels, they all collect at the center). Because the grain bed is significantly thinner, there is almost no chance of channelling in the mash and you are able to siphon of the wort by use of the pump, creating a vacuum, thus saving a lot of time and effort. One of the guys did an experiment where they brewed a double batch in the same time it takes to brew one on a standard system (just under 10 hours), the vacuum lautering is one of the main reasons you are able to do this.

-
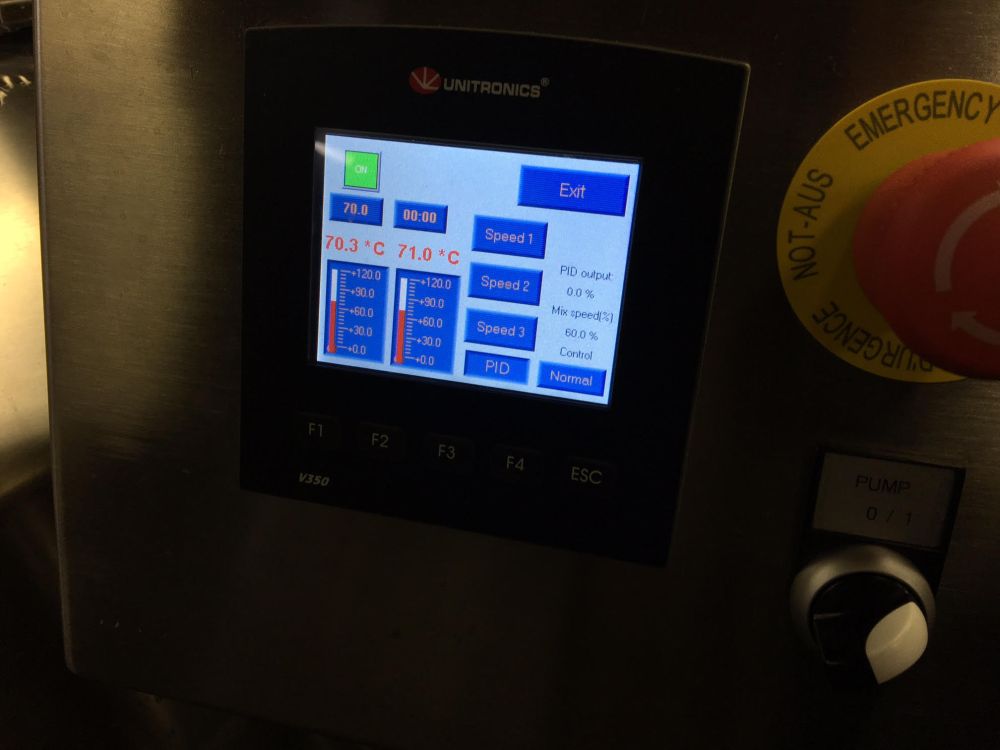
Easy to operate software
I always dread going to a new client and new brewery to consult, when I come across some of the electronics and software some people manufacture – some of them are so bad, it’s like they stole it off a Soviet-era nuclear reactor and repurposed it for brewing. With the Brewiks system, I’ve found no such hassle. The software is easy to understand and operate, with both a manual function as well as an automatic mode where you can program your recipes in and it only beeps if it wants something from you, like a hop addition during the boil. One brew day in and you’ll be an expert with their no-nonsense approach to electronics.

-
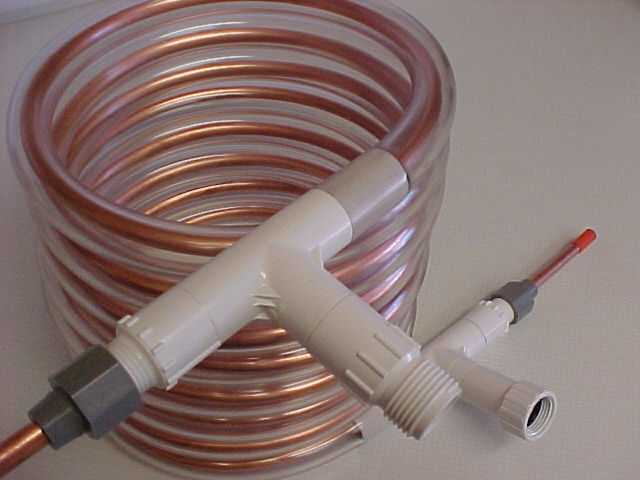
Built-in Counterflow Chiller
Now I know a lot of breweries rely on their plate chillers, all of them I work on except the Brewiks system have one, but I’ve never understood why everyone is so hell-bent on getting their wort as cold as possible. When I chill, I want the wort to be at around 20°C to 30°C for ale yeast and around 16°C to 18°C for lager yeast lag phases. Anyway, if you don’t know what a counter flow chiller is, it is simply a set of 2 pipes, one inside the other – cold water runs in the larger pipe and the hot wort runs in the smaller centre pipe in the opposite direction. This way, you get hot water out one end (that goes back into the kettle for your next brew) and cool wort out the other, ready for optimal pitching conditions for your yeast of choice. The plus sides are that with the Brewiks method of cooling, it’s a pipe, so nothing can get stuck in it necessitating serious cleaning unlike the plate-chiller counterparts. Also, this chilling method is built in to the Brewiks brew house, no further installation / cleaning / hassle required. Nuff said.
-
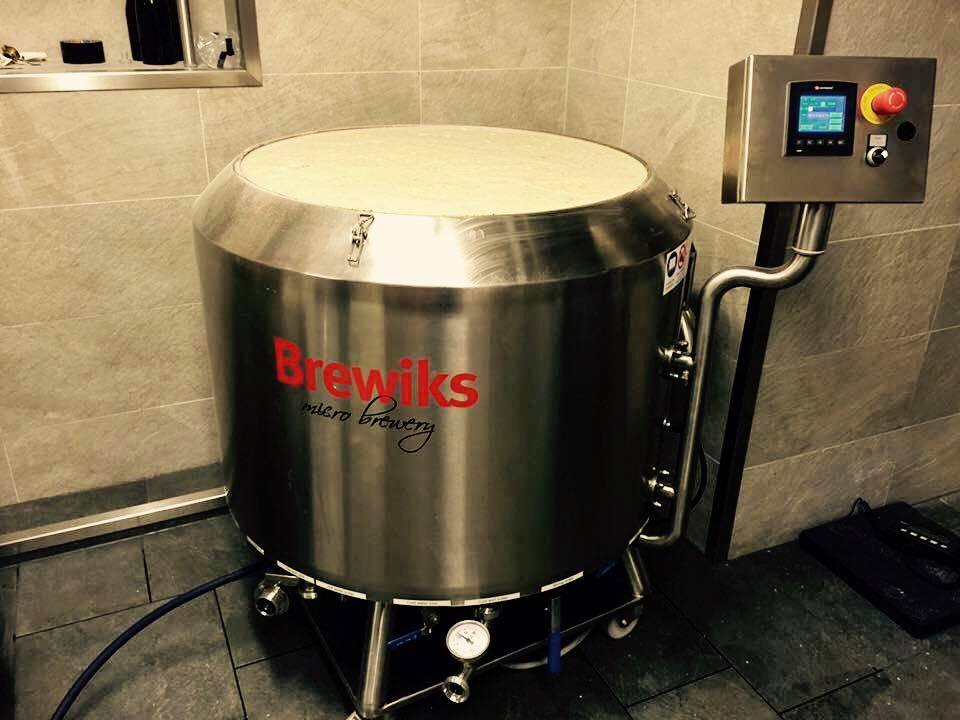
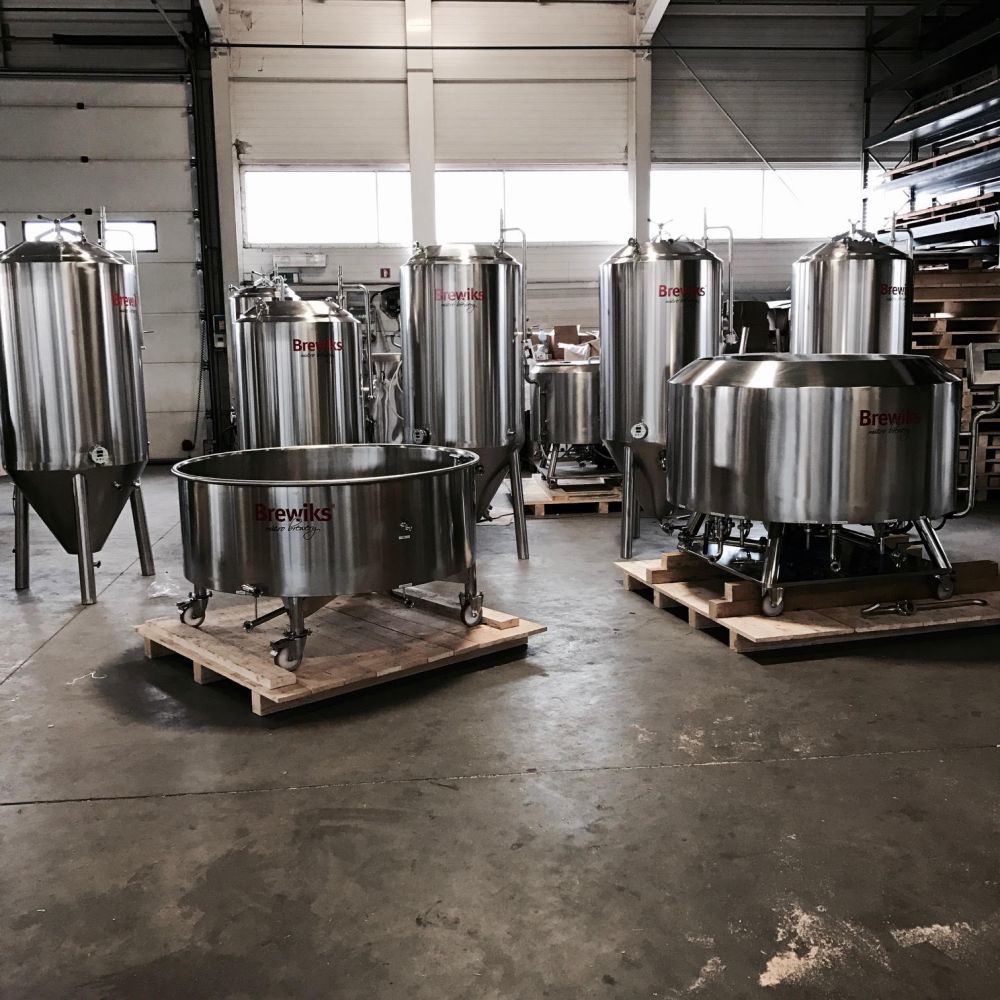
Compact Build
As you can see from all the above features and images, Brewiks in its entirety wholly comprises of only 2 items, namely: 1. Mash tun / Boiler / Chiller combo and 2. Lauter Tun / Whirlpool combo. You save so much time, effort and money because of this simple fact that it doesn’t really require any further explanation. Everything in this article is made in a series of 2HL, 3HL, 5HL, 10hl and 20HL models – perfect for every craft brewer on the planet!
-
Specialised techniques
Now this part is something I’ve come up with myself, as the boys down at Mitrhaeum didn’t realise this was possible until I did it (I really have put this system to the test!). Firstly, cereal mashing is possible as there is not minimum amount of water you need to put in it for it to work. If I’m doing a witbier, I will first cereal mash the wheat before I add the rest of the water to start the main mash. Similarly with decoction, you don’t need a separate decoction kit like you would need with cereal mashing. It uses a series of rubber pipes to connect one part to the other for different purposes – I simply connect the rubber pipe to the pump inlet, make sure there is water or wort in the pipe, and shove the other end into the mash while using the suction like a vacuum cleaner to suck up enough material to decoct – then simply pump it back into the lauter tun, no mess no fuss.
-
Price
This system will cost you a fraction of what another system will cost, notwithstanding the expenses you don’t need to incur due to the clever design mechanics. A 5HL setup starts at about 37,000 euros FOB for the brewhouse.

System drawbacks
Now, in the spirit of being as unbiased as possible, I’ve tried to scrutinise every aspect of the system in terms of what could be considered a drawback, but for me there are none. The only thing I can think of is that the Brewiks system is a very manual system in terms of changing pipes with fast-connect clamps and adding or removing grates for lautering or whirlpool functions. So, if you are a chronically lazy brewer (to the point where it’s an effort to breathe on your own accord), then – and only then – would I not recommend the system. If, however, you are a creative brewer that takes pride in your creations and does not want your system to be the limit of what you can do, look no further.
To conclude, I have found the Brewiks brewing system to be everything I wanted in a brewery setup – I personally won’t buy anything else. It’s well made, every inch carefully crafted by hand to be as perfect a tool in today’s craft beer market as can be.
To sum up, the Brewiks system is honest, straight-forward and hard working – just like the people at Mithraeum that made it in the first place.
Cheers to the Brewiks Team! I’m your biggest fan!

Regards –
The Kruger Brewer
(If you have any questions regarding the system or techniques, please feel free to contact me via the blog OR you can contact them directly at info@brewiks.com )

Thx for the great overview !
I have ordered my Brewiks 500 and only few weeks to arrive.
I am looking forward to star brewing with this great system.
LikeLike
That’s great to hear, my friend! You’re going to have a lot of fun on the system!
LikeLike
Thanx for your unbiased frank and detailed review of brewiks system.
After reading your blog, i have short listed brewiks 2000 ,5 vessel brewhouse. I am sure it meet and exceed all expectations…
LikeLike
Glad to hear it, Madhur!
LikeLike
I would love to learn more about your decoction method used on the Brewiks!
LikeLike
Hey Rob! Thanks for the comment! I’ll take it one step further and add a how-to video in the future! Subscribe to both https://www.youtube.com/user/CastleMalting and https://www.youtube.com/channel/UC1zqf2XxEpPuQDOJDehBkFA
Thanks!
LikeLike